Saturday, 13 October 2018

Congratulations Toast - Design Team Member: Verity


Hello! So good to be here. It's Verity here from Pretty Little Button with another card for you today. This card was one of the first cards I made when I received the lovely stamps from Colourific. However, I am only just getting around to showing you it today. This card is very easy to make and the stamps from Colourific do all the talking on this card!


Congratulations Toast card details:

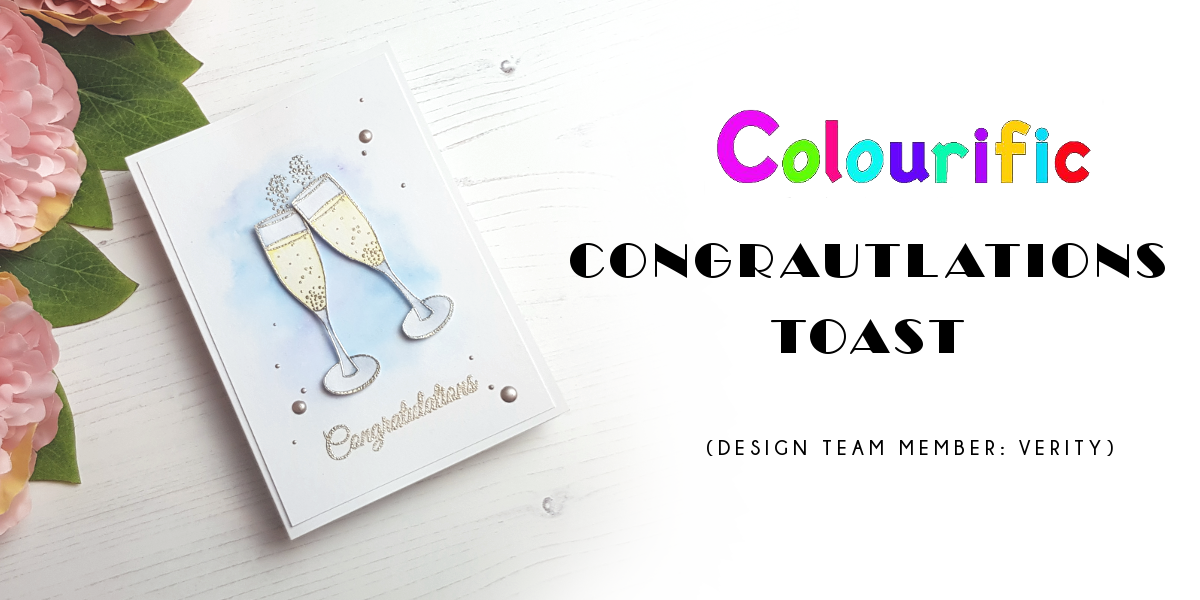
To start, heat emboss in platinum embossing powder two champagne glasses onto white card. These were coloured in with watercolour paints, but I did not use watercolour paper. The amount of water used was very small so I was able to get away with just using the regular white card. Watercolour paper isn't a true white, which I wanted for the card, so this I why I did not use watercolour paper. If you prefer to, you can do this just as well with watercolour paper. 

Handmade congratulations toast card made by Verity Biddlecombe

I only used a couple of colours for this card, using a blue-grey for the glass and a light yellow for the liquid. I didn't do any fancy shading and wanted to keep it simple. These were fussy-cut out once dry.


For the background, I added clear water to a white card panel and dropped in a selection of blues allowing them to blend on their own. I did not add the colours close to the edge of the water on the card in order to get a soft fadeout.

The panel was adhered to a white card base and the glasses foam mounted on top. There is a little 'bubbles/fizz' stamp in the stamp set which I heat embossed directly onto the card panel above the glasses, along with a sentiment beneath. 


The card was finished with a few platinum Nuvo drops as embellishments. 


I hope you love today's card and don't forget to check out the stamp set, link below. If you loved this card please leave a comment below as we would love to hear from you. 


Until next time!

Verity


Pretty Little Button Blog | Instagram | Facebook | Youtube


Thursday, 11 October 2018

Marleen DT - Rainbow Princess cards

Hello Beautiful People

Todays post is for
Colourific as its once again my turn to share some inspiration..

For todays cards I have gone all rainbows but with a girly feel to them.
I have used the
A5 Princess Carriage set for both cards

Both cards are pretty much made the same way. Distress ink rainbow effect, sprayed with a homemade perfect pearl mist. . My sentiments has been stamped strait on to my backgrounds as is the start on the carriage card and the horse itself.
On the carriage card, I stamped onto black cardstock and heatset with gold embossing powder and the fuzzy cut the carriage. Its onthe background with foam pads.
Finished both cards with a few clear nuvo drops and that is about it.

with wee gaps but I just used a fine liner to fil in any gaps.
And that is it for today. Thank you for popping by and for any comments left behind.
Dont forget to come visit me on FaceBook, Twitter, Instagram, Pinterest, Youtube or my FB page.
 Happy Crafting

Tuesday, 9 October 2018

Be True ~ Design Team Member ~ Aly

Hi there my turn to blog today, here I have used the gorgeous A6 Moderne Flowers, stamp set to create a lovely clean and simple card. I have embossed the flowers with white embossing powder and used Oxides in various colours and spritzed. I have made the flowers separately to mount onto the front of the card. 


Hugs 


Saturday, 6 October 2018

Colourful block stamping- DT member Verity


Hello! So good to be here. It's Verity here from Pretty Little Button with another card for you today. This card features stamps from the A6 Moderne flowers clear stamp set from Colourific. This stamp set has some beautiful designs to it, but I just picked the two sketchy stamps for these cards. I wanted to show you how versatile this set is, that you can use these stamps in other ways than just the way they were first intended for. They were perfect for colourful block stamping, creating two bold and modern cards.


Colourful block stamping card details:

For this first card, mask off a square on an 8.25" x 3.5 white cardstock. Using the main flower from the stamp set, stamp repeatedly over the square in black ink. For a professional look, make sure you stamp over the edge of the square, though make sure you have masked your card beneath off as well.


Using a marker colour in sections of the flower for a modern bold look. I used a Zig Clean Clear Clour brush here but you can use any marker as long as you have used the right ink and paper for that marker.


Mat this panel with two thin strips of black card and wrap black twine around the bottom. Foam mount this panel onto an 8.25" x 4 white card base. Stamp a sentiment from you crafty stash and finish with a few Nuvo drops.


For this second card, mask off a long strip down an 8.25" x 4 white card base. Using a piece of acetate, ink smoosh selection of distress oxides onto the card. The easiest way to do this is by smooshing the ink pad onto a smooth slick surface like a glass mat. Spray this with water until the ink moves about. Place the acetate sheet down and pick up some ink. Transfer this over to your card, and smoosh down.


Keep applying colours until you are happy; you can dry the layers in between if needed. Using the sketchy petal from the stamp set, repeatedly stamp in black up and down the panel. Just make sure you haven't removed your masking tape yet. 


When happy, remove the masking tape and stamp a sentiment from your crafty stash. To finish wrap black twine around to help bring contrast to the card. 


Colourful block stamping creates bold and modern cards, perfect for any occasion. Whatsmore you can use any stamp to create these card, even if you aren't using them in the traditional way. The moderne flower clear stamp set is a perfect example of using them in a different way than intended, showing the versatility of this stamp set!


I hope you love today's card and don't forget to check out the stamp set, link below. If you loved this card please leave a comment below as we would love to hear from you. 

Links:


Until next time!

Verity


Pretty Little Button Blog | Instagram | Facebook | Youtube

Friday, 5 October 2018

Hydrangea ~ Design Team Member, Karen

Hello everyone!  It's Karen posting for you today, and I'm sharing a card that started out as a wreath... but ended up being a hydrangea ( ??? ).  Scroll down for the details...
 I started out by stamping multiples of all three sizes of the outlined flower images from A6 Moderne Flowers, and a bunch of the outlined leaves from the A6 Leaves set on a large piece of watercolour paper.  My intention was to paint them all in autumn shades, fussy cut them out, and put them together to make a wreath.  But there was something about seeing 25 or so of the flower images side by side that made me think "hydrangea".  So my plan did a complete about take, I found a blue that I painted them all with, and got busy cutting.
 I gradually watered down the shade of blue that I was using, making some of the blossoms lighter, and lighter still, as I knew I wanted some to be hidden behind that would be darker, or in 'shadow'.  I used a bright yellow mixed with a bit of green to make up my limey/green leaves, varying the colour a bit on each one.  At first glance it looks like an awful lot of cutting!  But once I got going, it probably only took about 45 minutes - easy to do while you watch a little TV.  I added a dot of silvery Perfect Pearls to the center of each flower, and let them dry.
I ran a couple of rows of irregular stitching around my white cardstock piece, and then started building my flower from the bottom up.  I used a bit of adhesive just on the center of each flower back, so that the petals all curve up a little, giving a lovely bit of added dimension shown below:
By far the scariest part of putting this card together was adding those little blue spatters to the background - after all the work of stamping/painting/cutting/assembling, I was panicked that I might drop a big blob of paint onto my work!  So it was definitely a less is more situation, and I stopped after getting just enough spatters to cover it.  I white embossed my sentiment onto black cardstock and adhered it with a few pop dots, and called it a day.  Happy stamping!

Wednesday, 3 October 2018

Gold Grunge by Atiya

Hi there!
This is Atiya from The Whatnots Shop. I am taking over the Colourific blog today. I am here with the Gold Glittered Grunge look.


To create this card, I have used Princess Text and Grunge Background stamp sets by Colourific. I absolutely loved the Grunge background. There are so many possibilities with it.

I had stamped the A6 Grunge Background using the Distress Embossing Ink onto a Pale White cardstock. Then, I went on with the Perfect Pearls - I have used Heirloom Gold and a little bit of Pewter. I absolutely loved the effect it gave to the entire card!


Next, I took the sentiment stamp from A6 Princess Text stamp set and chose 'Hope your Day is filled with Love'. I stamped it using Atenew's Jet Black. I have used a light cream cardstock for this.

I added a layer of dull gold glitter sheet in between the base and the stamped cardstock.

In the end, I added a few pearls to give it a bling.

This is all for today and I hope you like the card. To share your creations using Colourific Stamps, you can join the Colourific Stampers Fan Group here.

See you next time!

Saturday, 29 September 2018

Birthday Unicorn - Design Team Member: Verity


Hello! So good to be here. It's Verity here from Pretty Little Button with another card for you today. When I was colouring in the Unicorn from the A5 Unicorns and Chasing Rainbows clear stamp set I knew straight away this would make a perfect birthday card for a little girl. I decided to play on the theme of pinks and purples but added a touch of grey to modernise it. This is a great card to have in my stash ready to send out, you should make one too!

Birthday Unicorn card details:

To start off, stamp the unicorn onto hot press watercolour paper in versamark ink and heat emboss. I used Pure Platinum WOW! Embossing powder as this would pair lovely with the colour scheme of the card. 

Unicorn birthday card handmade by Verity Biddlecombe

Next, I used my Tropical watercolour pan from Prima marketing to colour the unicorn in.  I added more colour to areas in the shadow to add some dimension and depth. I also used a soft grey ink to add a little shading around the edge of the horse head. 


To add sparkle to the unicorn I added versamark ink with the use of the versamark pen and add holographic embossing powder, and heat set this. Once the unicorn was complete, this was fussy cut-out. 

For the rest of the card, I die cut a stitched circle out of purple card. For added interest, I clear heat embossed the A6 Tiny flower background clear stamp. Before foam mounting this onto the card, I used soft stencil brushes to ink blend Tattered Rose distress oxide onto the card panel. I wanted a soft pink haze around the die cut circle. 


I cut down a few grey strips of card and adhered this onto the card panel with double-sided tape. Both the die cut circle and then the unicorn was foam mounted onto the card to give lots of dimensions. A grey die cut sentiment was added to the card along with a small stamped sentiment in matching ink. 


To finish the card off, a selection of purple and pink sequins were added to the card panel. 


I hope you love today's card and don't forget to check out the stamp set, link below. If you loved this card please leave a comment below as we would love to hear from you. 


Until next time!

Verity


Pretty Little Button Blog | Instagram | Facebook | Youtube


Love Life

Good Morning Monday again.  The weather here has been awful, rain, hail, snow, and sunshine all in the one day! Too wet and cold to go out...