Showing posts with label A5 Rings stamp sets. Show all posts

Friday, 22 November 2019

Evergreen

Hi, Maria here with my Friday post.  Today we have the Evergreen card which is made using 3 different Colourific stamp sets - Winter Wonderland, Beach Borders and A5 Rings.

Here’s what you will need-
6x6” Card Blank
5x5” White Stamping Card
5.5x5.5” Dark Green Card 
Winter Wonderland Stamp Set
Beach Border Stamps
A5 Rings Stamp Set
Black Versafine ink pad
Clear embossing powder
Tonic Nuvo Drops in Gold, Turquoise, Light Green, Dark Green, Silver
Clear sparkle Glitter Glue
Green Versafine
Watercolour paints

Here’s how I made it
  1. Using the 5.5x5.5” stamping card, stamp the Star Ring in the centre of the card using the Versafine black ink and emboss with the clear embossing powder.  Fill in the stars using green watercolour paint.
  2. Stamp a Medium Tree and two smaller trees, from the Winter Wonderland stamp set, into the middle of the Ring and colour in using the Watercolour paints.
  3. Using the green Versafine Ink, stamp and emboss the sentiment from the Winter Wonderland stamp set just under the ring.
  4. Now take the pebbles border from the border stamp set and stamp and emboss around the outside edges if the square.
  5. Using the Nuvo drops, randomly fill in the pebbles.
  6. Add some clear glitter glue to the trees and under the trees to ground them - to look like snow.
  7. Leave this to dry for a few hours to make sure all the Nuvo drops are dry.
  8. Mount onto the dark green card then adhere to the card blank.
There you go, all done, hope you like it.  Tune in next week for another card.


Monday, 21 October 2019

Love, it’s not just black and white - it’s golden too

Keeping the colours simple today, Black white and gold. Using the Love Wordage stamp set, Beach Borders and baubles from the Rings stamp set - all from Colourific 

Here’s what you will need:

A4 White card
A4 Black card
A4 Gold Miri card
Love Wordage Stamps
A5 Rings Stamps
Beach Borders
Gold Embossing Powder
Versafine Onyx Black
Versamark
Gold Gel Pen
Black Felt Tip pen
3D foam pads

This is how I made it:

  1. Cut a piece of white card 6.5x 4.5”.  Stamp the Love word using Black Versafine onto the white card and colour in the L, o and e using the gold gel pen and the v in black felt tip along with the flourish on the L.
  2. On a separate piece of white card stamp and emboss 8 baubles from the rings sets as shown in the photo, using Versamark and Gold Embossing powder.  Colour in using the black felt tip.
  3. Stamp 3 part borders at either side of the card and emboss in gold.
  4. Stamp and emboss ‘at Christmas’ in the bottom right corner.
  5. Mount onto black then gold Miri and stick onto an A5 white landscape card.
  6. Cut out the baubles and apply 3D foam pads - stick under each of the borders as shown in the picture.
  7. Using the black pen, draw in the strings from the borders and the flourish on the L to the top of the baubles.

Hope you enjoy making this elegant card.

Maria x

Friday, 18 October 2019

Rings and Borders

Happy Friday everyone, what a busy week! I hope you have enjoyed looking at all the cards in the new launch from Colourific.  In today’s card I have used stamps from the Beach Border and the A5 Rings stamp sets.


Here is what you will need:

Dark red square card base
Dark red card
White Stamping Card
A5 Rings Stamp Set
Beach Borders Stamp Set
Versamark
Gold Detail Embossing Powder
Gold Nuvo Drops
Onyx Black Versafine
Clear Embossing Powder
3D Foam Pads
Watercolour Pencils
Squeezed Lemonade Distress Ink
Iridescent Glitter Glue

Here’s how to make the card:

  1. Firstly, stamp the star ring using Black Versafine and Clear Embossing Powder.
  2. Stamp and emboss the candle from the Rings set using the same ink and powder.
  3. Colour the candle and the stars using watercolour pencils.  When dry, lightly blend a little of the Squeezed Lemonade ink over the area where the flame is to give it a yellow glow.
  4. I then decorated the mat layers with the zigzag and dots border around the four sides of the dark red smaller square and the larger white square, crossing the lines at the corner.  For the borders I stamped with Versamark and Gold Detail Embossing Powder.
  5. On a separate piece of card, I stamped 4 baubles in Versamark and gold embossed them.  I coloured these in with watercolour pencils.
  6. Cut out the ring leaving a 4 mm border and fussy cut the four baubles.
  7. Mount the ring in the middle of the red square using 3D foam pads.
  8. Mount the red square onto the white square and the white square into the red card base using glue or double sided tape.
  9. Finally fix the 4 baubles on the four corners of the white square using 3D Foam pads, add a gold Nuvo drop to the corners of the red square and add a touch of glitter glue to the baubles and candle flame.
Watch out for tomorrow’s card!
Maria x


    Thursday, 17 October 2019

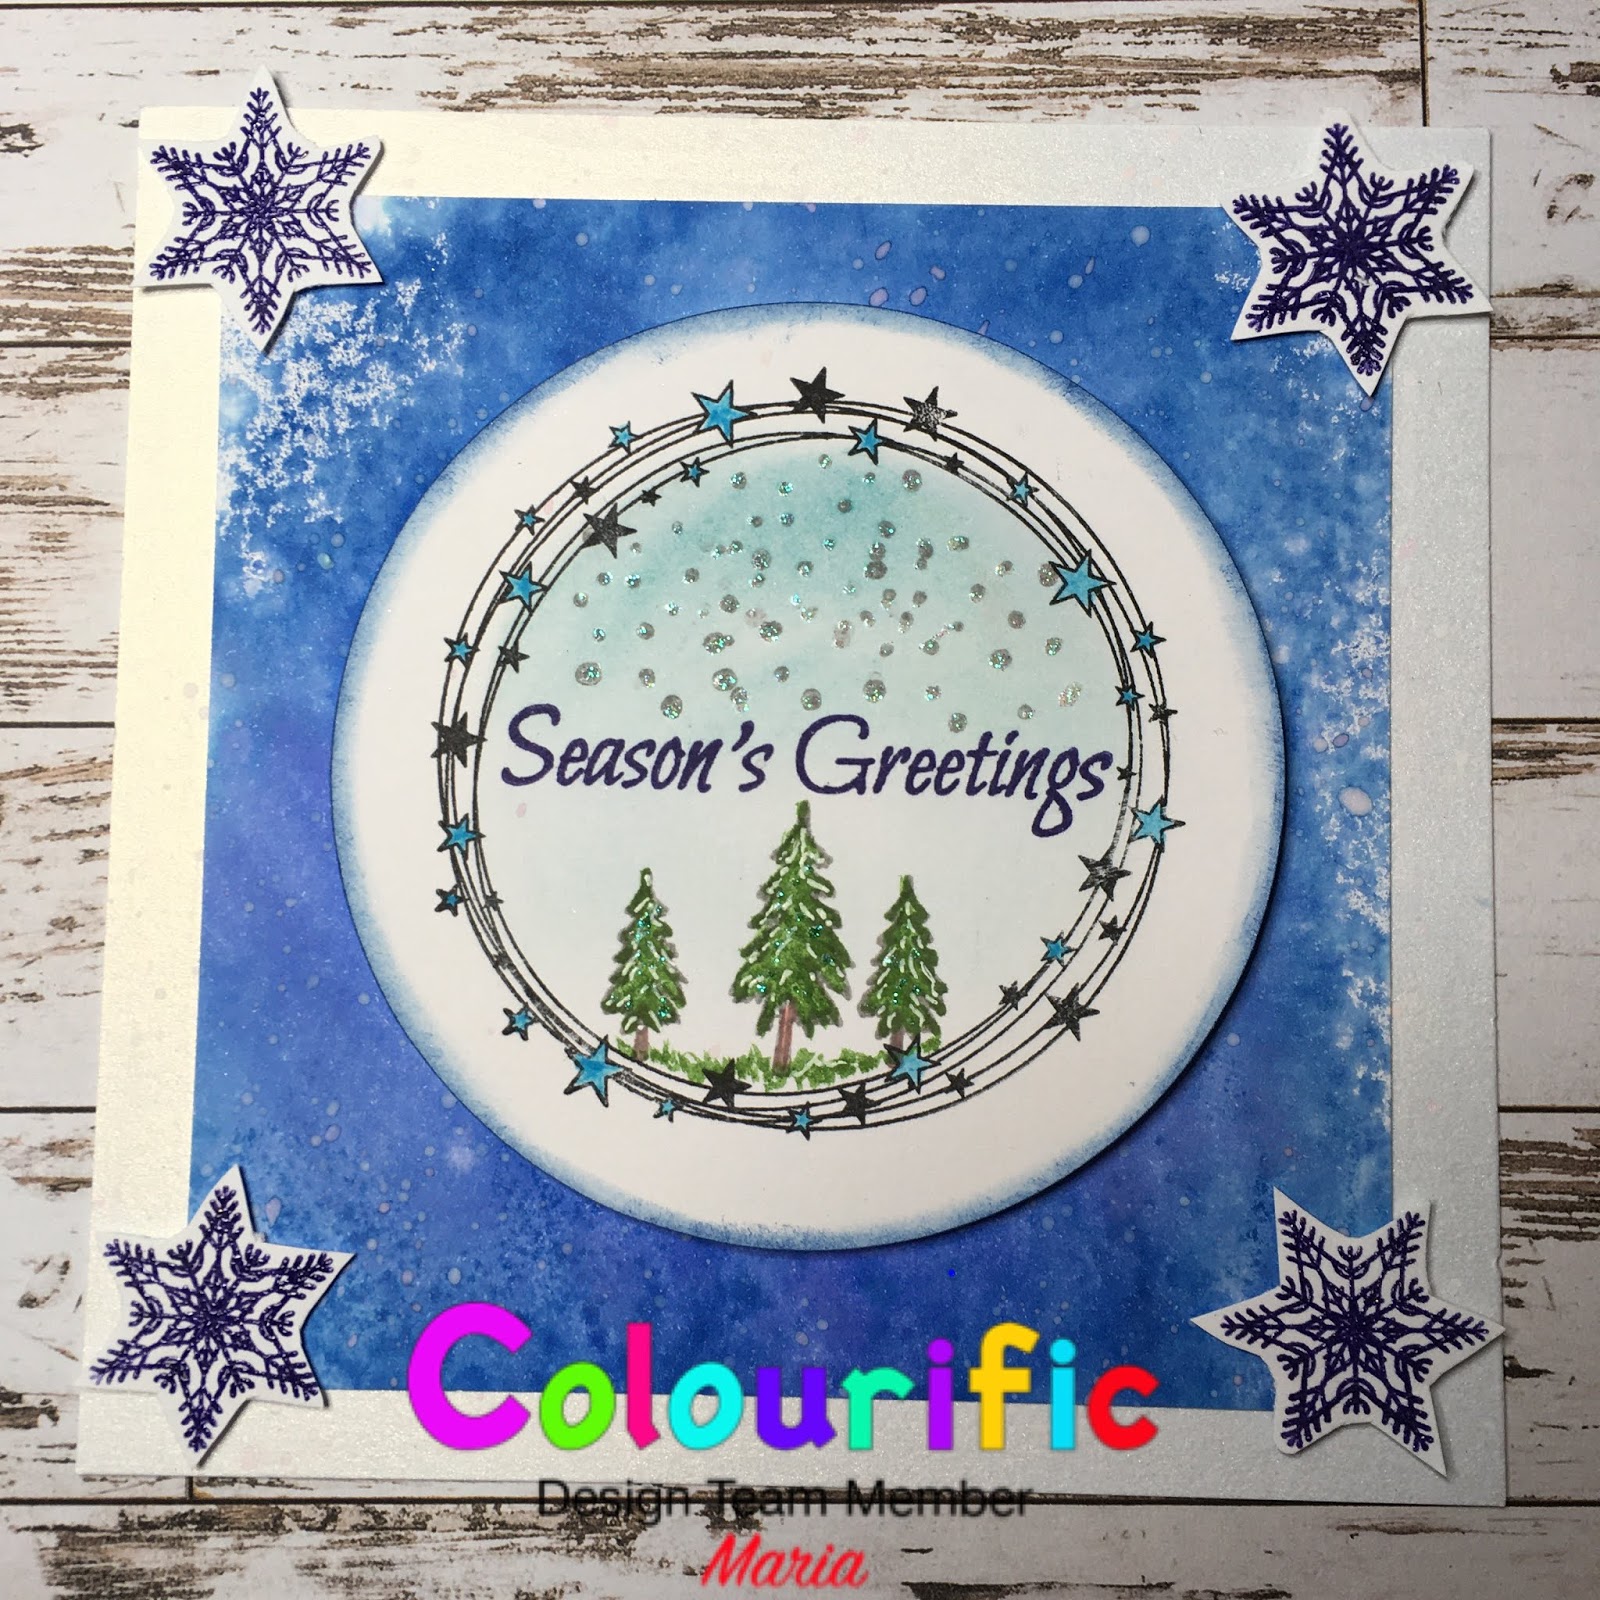
    Winter Scene in a Ring

    Here’s another card showing you one of the new stamp sets from Colourific.

    Here’s what you will need:
    A5 Rings stamp set
    Winter Wonderland Stamp Set
    Distress Inks - any blue - I used Salty Ocean
    Watercolour paints or pencils
    Clear Embossing Powder
    Versafine Onyx Black
    Versafine Clare blue
    White and blue Gel Pens
    Iridescent Glitter Glue
    3D Foam pads
    6x6” card base
    Stamping card
    Die cutter - circles or punch

    Here’s how I made it;

    1. Cut a piece of 5x5” stamping card.  Stamp the Distress ink onto a blending mat and spritz with water, swish the card through the ink and dry.
    2. On a separate piece of card, stamp the stars ring in black Versafine.  Cut out a circle around this stamp - I used a die cutter or thus or you could use a punch. 
    3. Stamp two small trees, one medium tree and seasons greetings in the circle and colour with watercolour paints or pencils. Add a blue wash for the sky and draw in some grass under the trees.
    4. Stamp some of the small dots for snow and glitter the top of the dots.
    5. Stamp and emboss 4 snowflakes onto a separate piece of card and cut out.
    6. With the white gel pen, colour in some snow on the trees and with the blue gel pen colour in the stars of the ring.
    7. Mat the blue inked background onto the card base and adhere the circle to the middle of the card using 3D Foam pads.
    8. Add the snowflakes to the corners of the blue background using 3D Foam Pads.
    Hope you enjoy making this card - the rings are very versatile and can be used as a frame for lots of small stamps and dies.


    Tuesday, 15 October 2019

    Reindeer in a ring of lights

    Hi everybody, here is the Reindeer in the ring of lights card I made for the new stamps launch.
    I used the A5 Rings and the Winter Wonderland stamp sets from Colourific.
    Here’s what you will need:
    A5 Rings Stamps
    Winter Wonderland Stamps
    Versafine
    Clear Embossing Powder
    Watercolour Pencils
    Multicoloured Fineliners
    Distressed Oxides - Peeled Paint
    White Stamping card
    Black Card
    White card blank (I used 7x7”)
    Glossy Accents

    Here’s how I made it

    1. Stamp the ring of lights in the centre of the stamping card (6x6”) using black Versafine and clear embossing powder.
    2. Stamp the deer and fawn in the centre of the ring and emboss. 
    3. Colour the main deer image in with Watercolour Pencils and the lights on the ring in felt tip pens (I used fineliners).
    4. Draw in some green grass under the Reindeer so that they aren’t floating!
    5. Using the Distress Oxide, blend all round the edge then sprinkle (flick) water on the ink - then blot with kitchen roll to give the white marks.
    6. Mount onto black card (6.5x6.5”) then onto the card blank.
    7. Use Glossy Accents on the fairy lights to make them shine - then let it dry.
    8. Add the sentiments using the black versafine and clear embossing powder, mat and layer onto black card and add to the finished card.
    All done - obviously you can play around with images in the rings and change the border colours - have a play.

    See ya later!

    Love Life

    Good Morning Monday again.  The weather here has been awful, rain, hail, snow, and sunshine all in the one day! Too wet and cold to go out...