Showing posts with label versafine. Show all posts

Friday, 29 November 2019

By the light of the silvery moon

Hi everyone Maria here, today I’m sharing my card I’ve named ‘By the light of the silvery moon’ and yes, I love Doris Day 😁. I used the A5 Houses stamp set from Colourific.
Here’s what I used:
A 6 card blank
Black card for mounting 
White stamping card
A5 Houses stamp set
Versafine Onyx Black
Coloured pencils
Watercolour ink brush pens (I used Spectrum Noir)
Kitchen roll
Adhesive
Double sided tape

Here’s what I did 
  1. Stamp and fussy cut out the small house, using the Versafine ink.
  2. Colour in using the coloured pencils (I drew in the curtains).
  3. Using the watercolour ink brushes, I added the blue to the top of a piece of stamping card and blended with a large flat brush and water - then I repeated with the amber colour and the green, making sure I blended the blue and amber colours for the sky but not the green.
  4. Dry this sheet using a heat gun or leave to dry naturally before you do the next step.
  5. Cut out a circle of card for the moon template - I used the top of an embossing powder lid to draw round.
  6. Place the moon template onto the sky - mainly into the blue section, and with a small wet paintbrush draw round the moon.
  7. Then with a medium sized brush wet the ink inside the circle and blot with kitchen roll - this brings the colour out of the moon giving it a faux bleached look.
  8. Glue the house onto the backing sheet.
  9. Mount onto white and then black card and then onto the card blank.

Hope you enjoy making this card.  Join me next Friday for more Colourific inspiration.
Maria x

Friday, 22 November 2019

Evergreen

Hi, Maria here with my Friday post.  Today we have the Evergreen card which is made using 3 different Colourific stamp sets - Winter Wonderland, Beach Borders and A5 Rings.

Here’s what you will need-
6x6” Card Blank
5x5” White Stamping Card
5.5x5.5” Dark Green Card 
Winter Wonderland Stamp Set
Beach Border Stamps
A5 Rings Stamp Set
Black Versafine ink pad
Clear embossing powder
Tonic Nuvo Drops in Gold, Turquoise, Light Green, Dark Green, Silver
Clear sparkle Glitter Glue
Green Versafine
Watercolour paints

Here’s how I made it
  1. Using the 5.5x5.5” stamping card, stamp the Star Ring in the centre of the card using the Versafine black ink and emboss with the clear embossing powder.  Fill in the stars using green watercolour paint.
  2. Stamp a Medium Tree and two smaller trees, from the Winter Wonderland stamp set, into the middle of the Ring and colour in using the Watercolour paints.
  3. Using the green Versafine Ink, stamp and emboss the sentiment from the Winter Wonderland stamp set just under the ring.
  4. Now take the pebbles border from the border stamp set and stamp and emboss around the outside edges if the square.
  5. Using the Nuvo drops, randomly fill in the pebbles.
  6. Add some clear glitter glue to the trees and under the trees to ground them - to look like snow.
  7. Leave this to dry for a few hours to make sure all the Nuvo drops are dry.
  8. Mount onto the dark green card then adhere to the card blank.
There you go, all done, hope you like it.  Tune in next week for another card.


Thursday, 17 October 2019

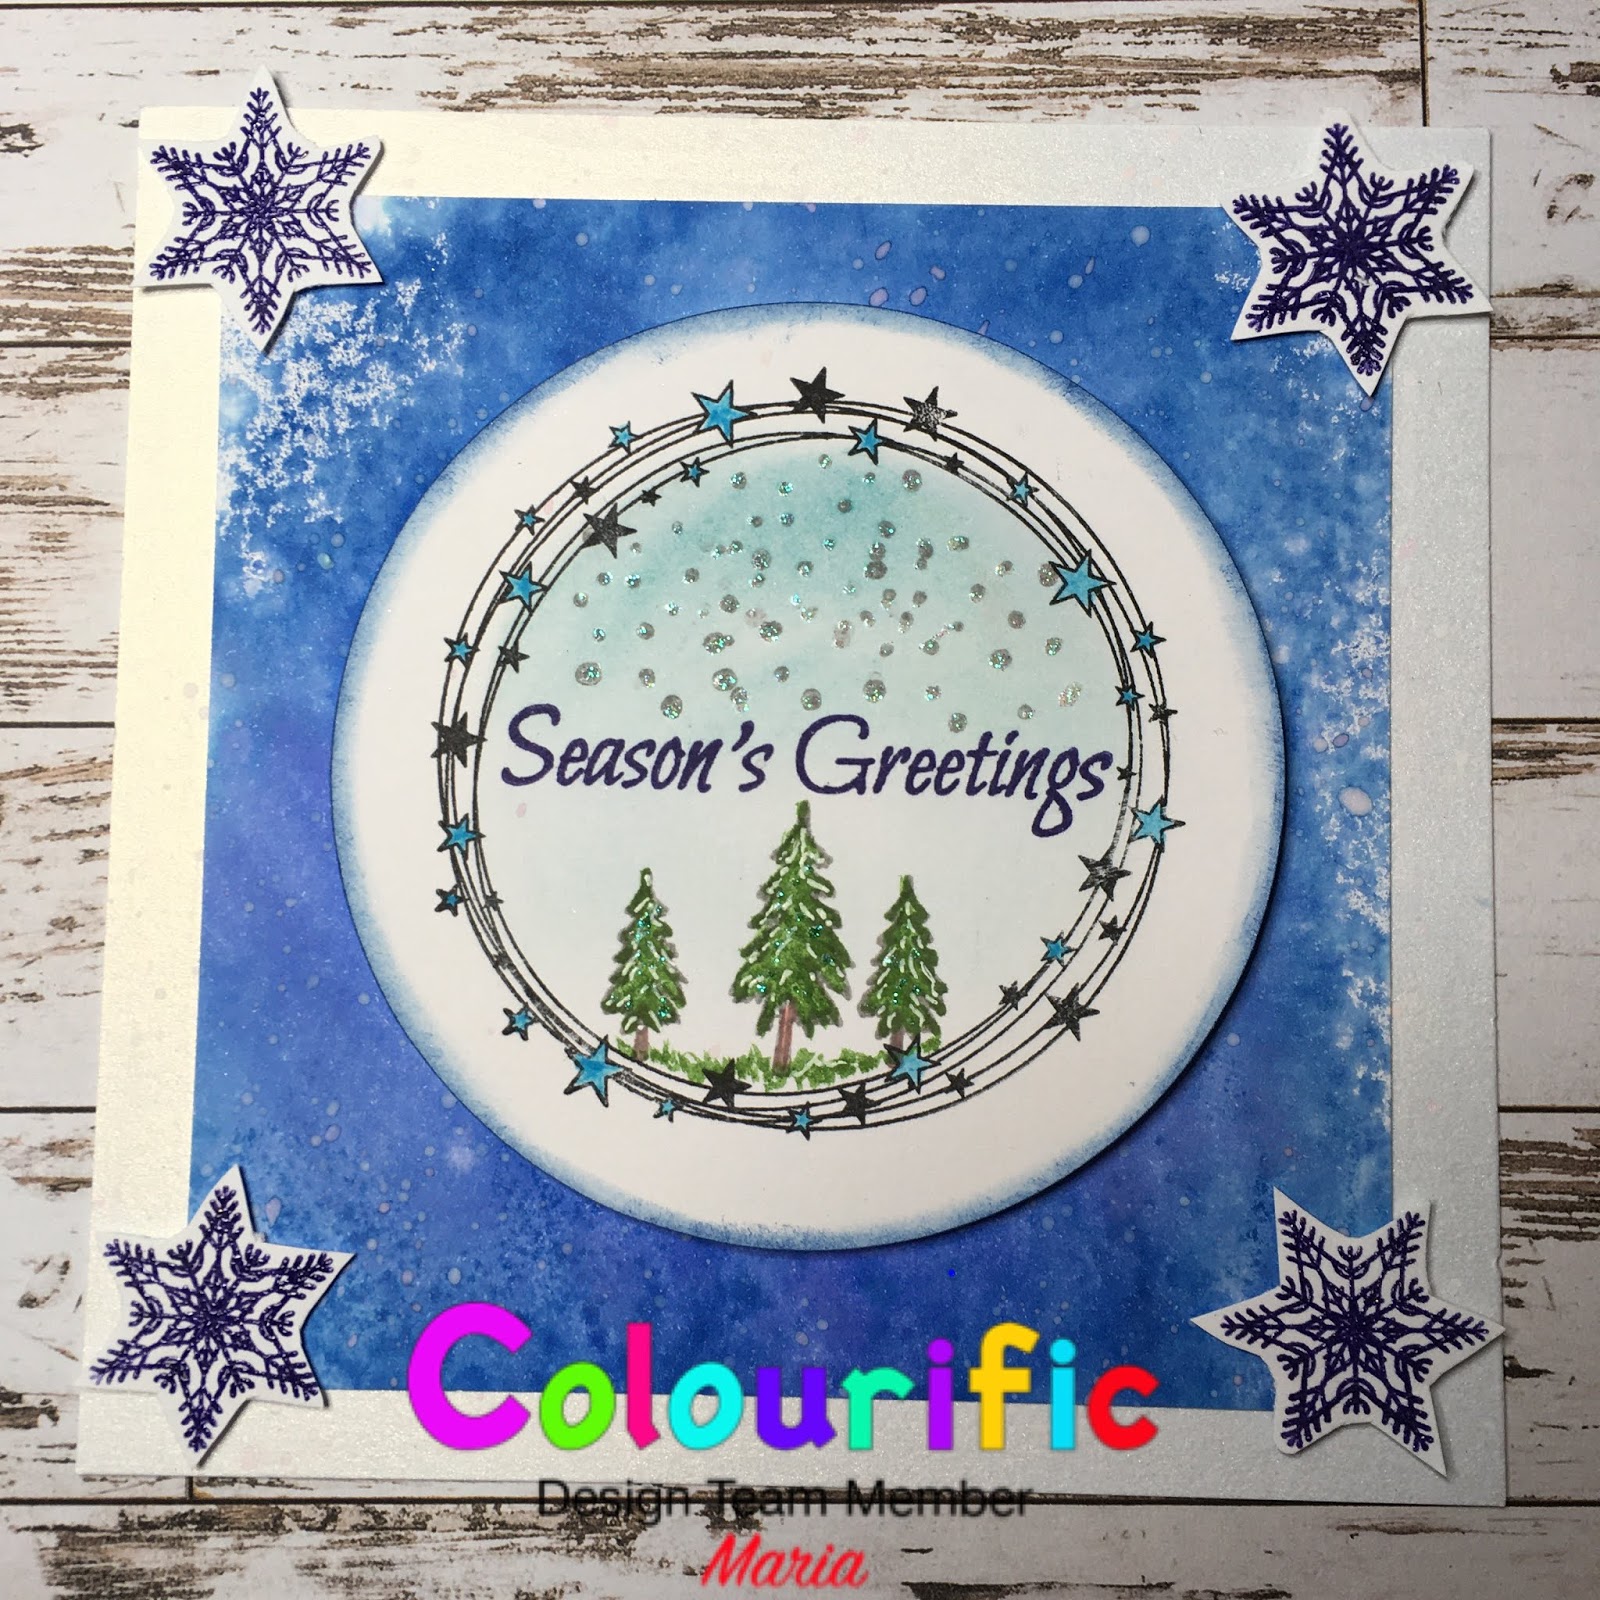
Winter Scene in a Ring

Here’s another card showing you one of the new stamp sets from Colourific.

Here’s what you will need:
A5 Rings stamp set
Winter Wonderland Stamp Set
Distress Inks - any blue - I used Salty Ocean
Watercolour paints or pencils
Clear Embossing Powder
Versafine Onyx Black
Versafine Clare blue
White and blue Gel Pens
Iridescent Glitter Glue
3D Foam pads
6x6” card base
Stamping card
Die cutter - circles or punch

Here’s how I made it;

  1. Cut a piece of 5x5” stamping card.  Stamp the Distress ink onto a blending mat and spritz with water, swish the card through the ink and dry.
  2. On a separate piece of card, stamp the stars ring in black Versafine.  Cut out a circle around this stamp - I used a die cutter or thus or you could use a punch. 
  3. Stamp two small trees, one medium tree and seasons greetings in the circle and colour with watercolour paints or pencils. Add a blue wash for the sky and draw in some grass under the trees.
  4. Stamp some of the small dots for snow and glitter the top of the dots.
  5. Stamp and emboss 4 snowflakes onto a separate piece of card and cut out.
  6. With the white gel pen, colour in some snow on the trees and with the blue gel pen colour in the stars of the ring.
  7. Mat the blue inked background onto the card base and adhere the circle to the middle of the card using 3D Foam pads.
  8. Add the snowflakes to the corners of the blue background using 3D Foam Pads.
Hope you enjoy making this card - the rings are very versatile and can be used as a frame for lots of small stamps and dies.


Tuesday, 15 October 2019

Celebrate Wordage Stamps on Coral and Amber

Everyone needs some word stamps and these from Colourific are just what you need.  You don’t even need a picture on these cards as this next one shows.
Here’s what you will need:

A5 Dark Red Card Blank
White Stamping Card
Black card for mounting
Distress Oxide inks - Abandoned Coral and Fossilized Amber
Blending mat or glass mat
Red Harmony Ink pad
Red and yellow fineliner
Onyx Black Versafine
Peach and yellow Nuvo drops
Gold gilding wax

Here’s how I made it:

  1. Stamp the Distress Oxides onto the stamping mat, spritz with water and swish the stamping card through the ink. Dry the ink off and repeat until you are happy with your background.
  2. Make sure the ink is completely dry before you stamp the Celebrate stamp onto the middle if the card in the red harmony ink. Colour in the gaps of the word with the red fineliner and the flourish and the stars in the yellow fineliner - see picture.
  3. Stamp the Congratulations and your special occasion in black versafine.
  4. Distress the edges with the Gilding wax.
  5. Mount onto black card, then into the dark red card blank.
  6. Distress the edges if the card blank with gold gilding wax - I use Pebeo gilding wax.
  7. Finish off by adding co-ordinating Nuvo drops in the corners of the dark red card and the inky background.
This is a stunning card which doesn't show up well in the photograph - messy and fun to do. Just remember to make sure all the inks are dry before moving to the next stage.

See you soon for the next tutorial


Reindeer in a ring of lights

Hi everybody, here is the Reindeer in the ring of lights card I made for the new stamps launch.
I used the A5 Rings and the Winter Wonderland stamp sets from Colourific.
Here’s what you will need:
A5 Rings Stamps
Winter Wonderland Stamps
Versafine
Clear Embossing Powder
Watercolour Pencils
Multicoloured Fineliners
Distressed Oxides - Peeled Paint
White Stamping card
Black Card
White card blank (I used 7x7”)
Glossy Accents

Here’s how I made it

  1. Stamp the ring of lights in the centre of the stamping card (6x6”) using black Versafine and clear embossing powder.
  2. Stamp the deer and fawn in the centre of the ring and emboss. 
  3. Colour the main deer image in with Watercolour Pencils and the lights on the ring in felt tip pens (I used fineliners).
  4. Draw in some green grass under the Reindeer so that they aren’t floating!
  5. Using the Distress Oxide, blend all round the edge then sprinkle (flick) water on the ink - then blot with kitchen roll to give the white marks.
  6. Mount onto black card (6.5x6.5”) then onto the card blank.
  7. Use Glossy Accents on the fairy lights to make them shine - then let it dry.
  8. Add the sentiments using the black versafine and clear embossing powder, mat and layer onto black card and add to the finished card.
All done - obviously you can play around with images in the rings and change the border colours - have a play.

See ya later!

Friday, 13 September 2019

Forest in Winter

Hi everybody, Maria here.  Today I'm going to show you how to make the Forest in Winter card using the A5 Winter Wonderland Stamp from Colourific.
To make this card you will need:
A5 Winter Wonderland Stamp Set
A5 Blank white card base
A5 Dark Green card
A5 sheets of white card
Onyx Black and Smokey Grey Versafine ink pads
Water colour Pencils
Clear Embossing powder
Gelly Roll Clear Star pen
Distress Oxides - Peeled Paint, Cracked Pistachio and Iced Spruce
Mardi Gras Carnivale Colourburst
Double Sided Tape
3D Glue Gel

This is how I made it:
1. Trim the A5 white card and the dark green card by 1 cm top and bottom so that it fits within the card base leaving a nice border.

2.  To make the background, stamp the three Distress Oxides into a blending mat and spritz with water, swoosh one of the white cards into it and keep doing this until you are happy with the result.  It is good to dry off the card in between the swooshes - you get some lovely effects. After you have done the last swoosh, before drying sprinkle on some of the Mardi Gras Colourburst into the wet ink and give it a spritz with water to make the colour burst.

3.  Let this dry, once dry, stamp the small forest trees randomly all over the sheet.

4.  Take the other sheet of cropped white card a cut 2 diagonal lines from the bottom left corner to either side of the top right corner in a V shape - see card.

5.  Stick this to the green card matching up the sides so that all you can see is the dark green V in the middle.  Trim the green card to 2 mm border of the inside of the white card.  See card. This gives the inside a border.

6.  Stick both these corners to the background sheet you just made, matching up the corners to give you the colourful inset.

7.  Stamp the small dots stamp all over the white triangles in grey Versafine.

8.  Stamp the Winter Wonderland stamp on the edge of the right hand triangle and emboss with clear embossing powder.

9.  Stick this to the A5 card base.

10.  On a separate piece of white card stamp 2 of the large trees and 4 of the medium trees using the black Versafine.  Colour these in - I used watercolour pencils.

11.  Cut out the trees leaving a small white border.  I then used the gelly pen to glitter the snow on the trees.

12.  Arrange the two large trees and attach using 3D glue gel to the bottom left so that it covers the bottom end of the colourful insert, add the other medium tree to the bottom right.

That's it, all done - how I wish I had photographed this one as I made it - it's so hard to explain without pictures.  If you are stuck or struggling to understand please ask and I'll try and explain.  Next time I make another one like this I will do the pictorial step by step.

Bye for now
Maria x

Love Life

Good Morning Monday again.  The weather here has been awful, rain, hail, snow, and sunshine all in the one day! Too wet and cold to go out...